When talking of the principle of functioning of the music notation software, the majority of specialists note their similarity with the well-known Word. In his article Music Notation Software, Dmitrii Monahov mentioned that „…due to their capacity the music notation software surpass the text editing software, for they can also reproduce and interpret a written score.” [3].
To show the possibilities and advantages of this type of software we conducted a practical work, and namely the writing of a score in Finale.
As a result of the investigation made at the level of theory, we found that in order to work in Finale one should take into account also the fact that on the monitor there shall appear 7 types of regimes or as D. Monahov calls them palettes of tools.
 The
same author suggests that in the case of creating one’s own
score it is necessary to „select the type of score”, in
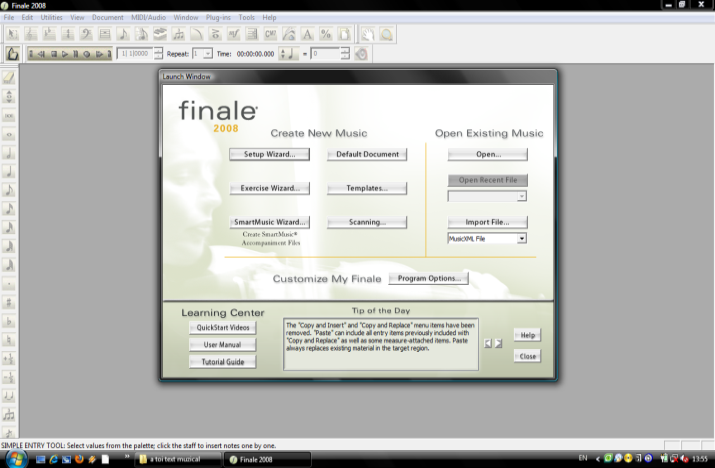
the first place. Thus, after accessing Finale
2008 there
shall open a window with more data on the monitor. We chose the
option Create
New Music/ SmartMusic Wizard …
(Picture
1).
Picture 1. Create New Music
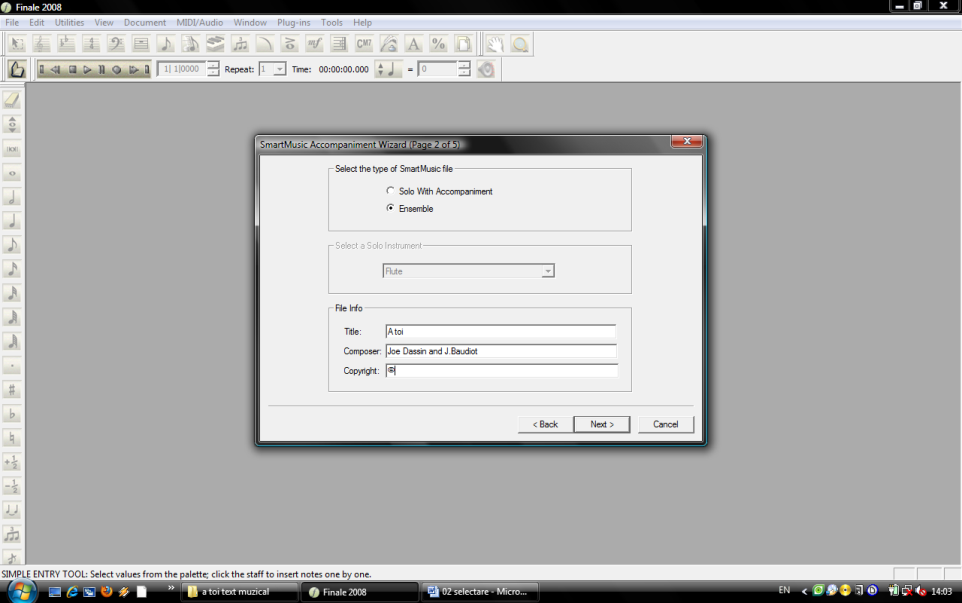
Subsequently, on the monitor we shall see a window, where we select the following data about the types of score, we select the type of instrument to play solo, we give a name of the piece, composer’s name and data on Copyright, then we access Next to pass to the next stage of work. (Picture 2)
Picture 2. A window where we state the title of the piece, the author’s name and the type of score
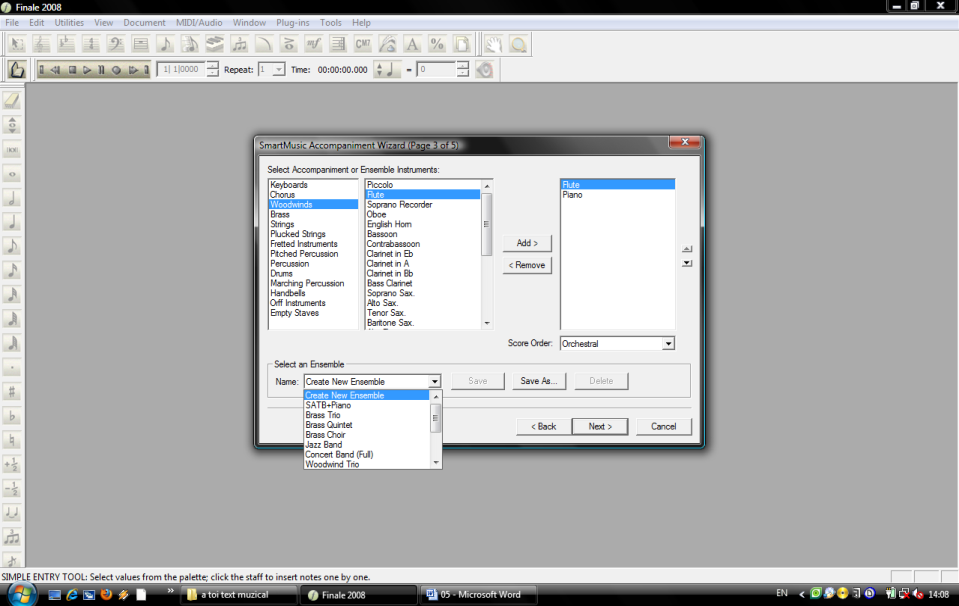
Now we shall select instruments to play a musical fragment of the piece. As we could note in Finale 2008 instruments are classified by ensemble (for example, jazz instruments or orchestra) and by musical instrument families (for example, the wind (instruments), percussion, the strings). We select an instrument we need and by way of Add key or a double click we add the instrument to the list on the right side of the window. (Picture 3)
Picture 3. A window to select instruments
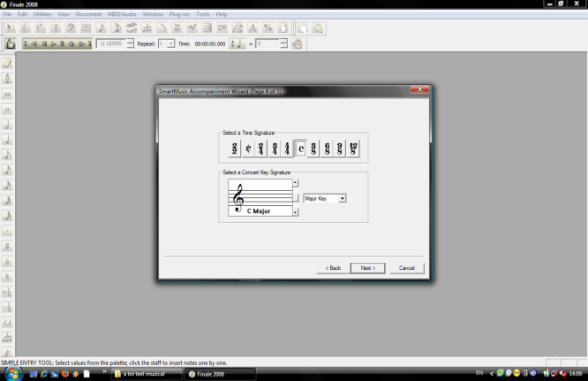
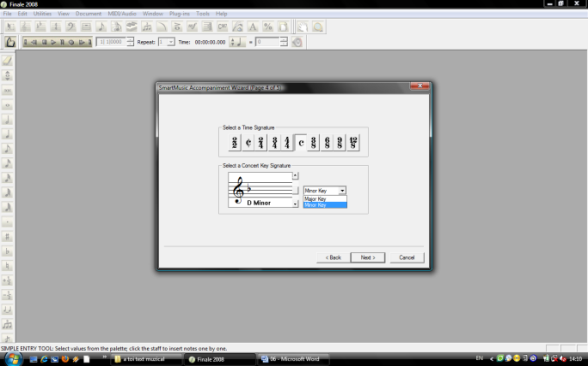
As well, we shall select the measure and then the key. (Picture 4 and Picture 5)
Picture 4. Select Measure Picture 5. Select Key
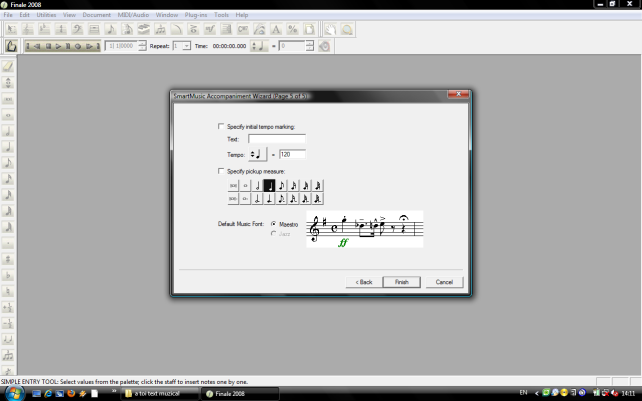
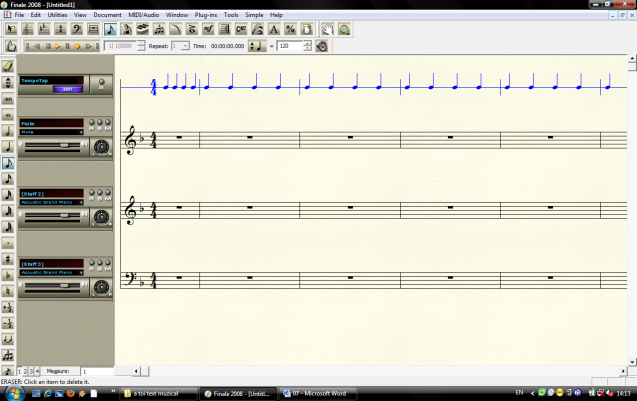
At the next stage of work we indicated the tempo and we selected a quarter note/crotchet =120 and the nature of notes. In the respective version of Finale music notation software we are given two options Maestro and Jazz. For the genre of our music piece we indicate Maestro – which we selected after we confirmed the settings indicated through accessing the Finish button at the bottom left of the window. (Picture 6 and Picture 7).
Picture 6. Indicate Tempo Picture 7. View New Music (Score)
The score appears on the monitor, followed by the stage of writing notes, dynamic nuances, accidentals, rests (pauses), etc. We should mention that in Finale there are three possibilities of writing notes on a stave:
1. writing notes with the mouse;
2. by way of computer keyboard we operate with;
3. by way of Midi key.
The writing of notes with the mouse, which we move on the monitor, is the simplest way, although it is slower compared to the other two. In the case of our music we used the first method of writing notes, which is also recommended for small-size music pieces. As well, we should mention that there are two ways of presenting a written page on the monitor in Finale:
a) Page View – presented as a page, just as the score will show when it is printed;
b) Scroll View – presented in a linear form, where one can only view a continuous system of notes.
In Scroll View it is convenient to work, when we write notes and edit the score, it is much easier to make such actions as delimitation, copying, erasing a fragment, but in Page View one can conduct the final process of placing the selected and edited text on a page.
To write notes on a stave by way of mouse we shall activate the option Simple Entry Tool from the toolbar at the top of the monitor. To write rests (pauses) we shall similarly activate the palette of tools for rests in the right side of the monitor. Thus, choosing from the respective palettes a note or a rest (pause) of the required duration, we shall place them on the stave in the appropriate order with a simple click.
O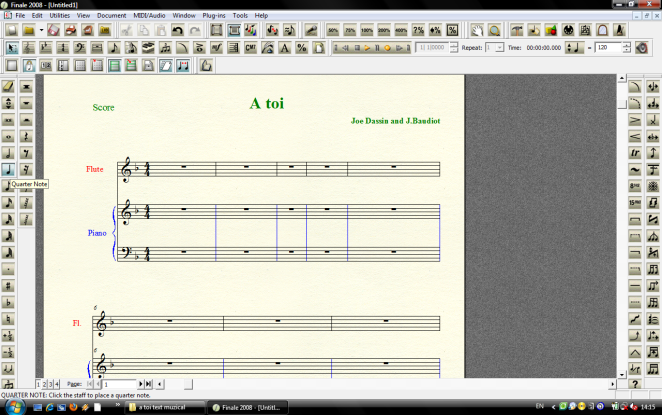 ption
Eraser
shall be used when an error should be deleted. If we enable this
option and click mouse
on one of
the notes on the stave, then the respective note shall transform into
a rest. The rest, however, shall be erased with a click, but other
notes in a time shall shift to the left. As well, in the toolbar we
find other options, like: legato,
value-added
point,
triolet etc.
(Picture
8).
Picture 8. Writing Notes with Mouse
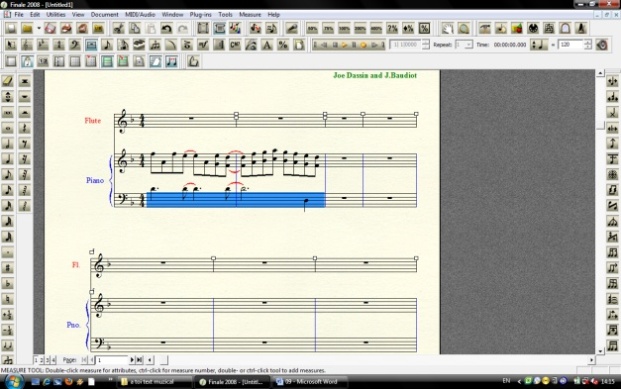
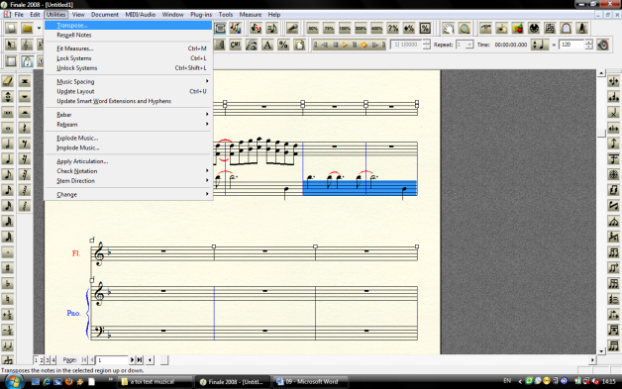
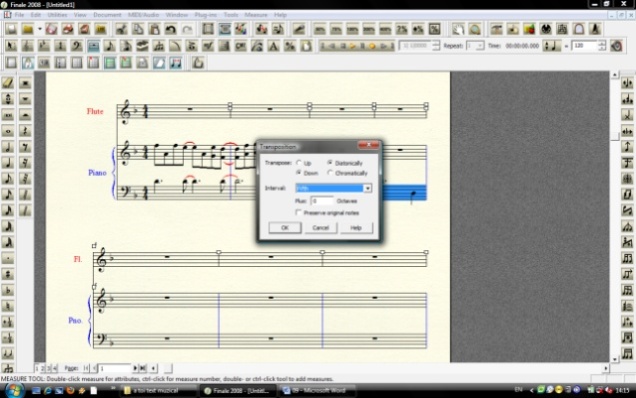
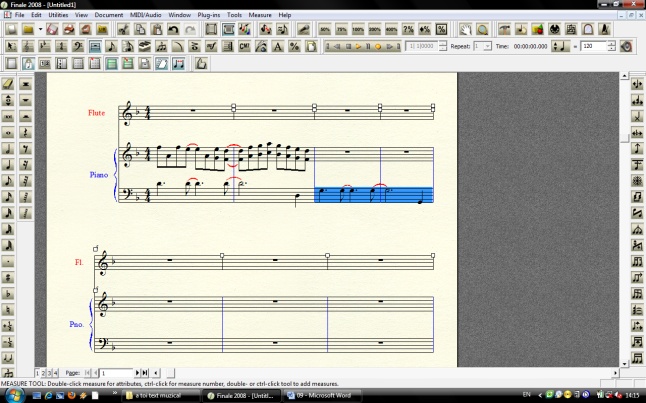
In bass(o) of the piano we mark the first two times in order to copy them in the 3rd and the 4th time. After that, with the mouse cursor we select from the toolbar Utilities →Transpose in order to conduct the transposition. (Picture 9 and Picture 10)
Picture 9. Mark Times for Picture 9. Mark Times for Copying Picture 10. Select Options for Transposition
The next step shall be to select from the window that appears on the monitor data related to the transposition. In our case we need to conduct a diatonic transposition with a fifth interval, in the descending order. Hence we select Up → Diatonically → Fifth and Ok to confirm data for obtaining the required transposition on the stave. (Picture 11 and Picture 12)
Picture 11. Select Data on Transposition Picture 12. Conducted Transposition
During the working process information should be saved. We note that in the toolbar there is an option Save, which is graphically rendered by the same symbol as in Word. Just as the in the well-known text editing software in this one we, too, have the option of undoing the last operation and its redoing – Undo and Redo. When we want to examine our work in detail, we should change the page settings: by means of the respective option – the key with a symbol of loop or by accessing View → Scale view to … and by ticking off the required percentage at its right. The settings of the viewed page on the monitor can be changed also by keys Ctrl+1=100%; Ctrl+2=200 %; Ctrl+3 =300 % etc. or by changing the percentage in the toolbar in the right side of the screen.
T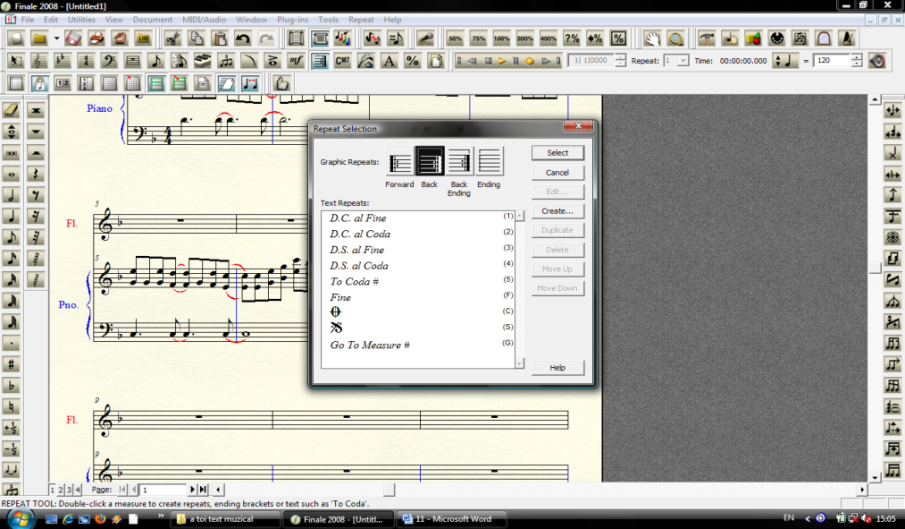 o
indicate the repeat signs (reprise and volta) we enable the option
Repete
Tool,
on
the screen there shall appear a window Repeat
Section,
where we shall select the corresponding symbol. The first two symbols
allow us indicating simple repeats, the third symbol indicates
simultaneous repeat with volta, and the forth is the introduction of
volta beginning. In compliance with the chosen work, we selected the
Back
option
and enabled Select
→ok so
that the corresponding change/amendments should be introduced in the
score. (Picture
13)
o
indicate the repeat signs (reprise and volta) we enable the option
Repete
Tool,
on
the screen there shall appear a window Repeat
Section,
where we shall select the corresponding symbol. The first two symbols
allow us indicating simple repeats, the third symbol indicates
simultaneous repeat with volta, and the forth is the introduction of
volta beginning. In compliance with the chosen work, we selected the
Back
option
and enabled Select
→ok so
that the corresponding change/amendments should be introduced in the
score. (Picture
13)
Picture 13. Indicate reprises
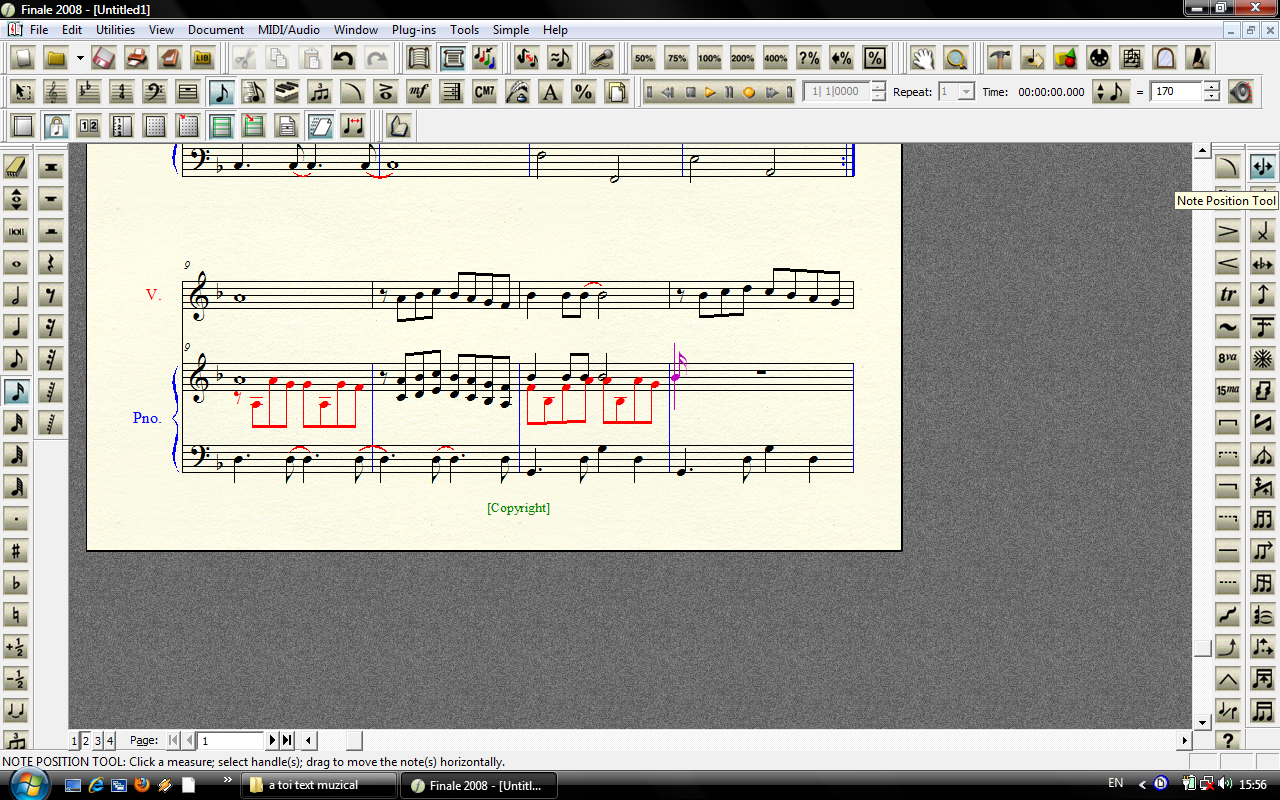
In Finale 2008, on a stave one can write up to 4 voices. At the left bottom of the screen we can see numbers 1, 2, 3, 4, which stand for the number of a voice. During the writing, the first voice shall be indicated in black colour, the second voice – in red colour, the third – in green colour and the fourth – in blue colour. However, on a printed score all voices will be shown in black. (Picture 14)
Picture 14. Writing the second voice
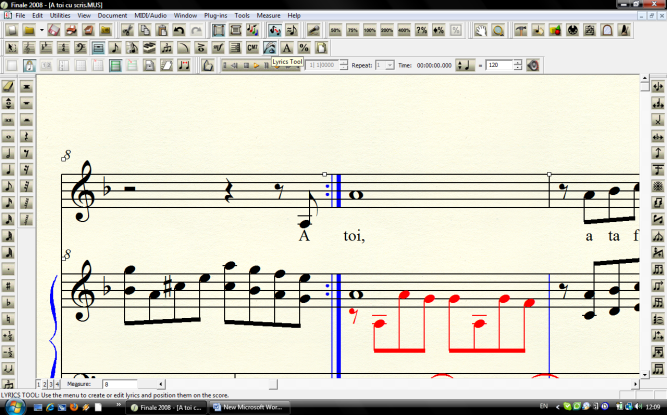
Introduction of text for vocal music in Finale is made by enabling the Lyrics Tool option. (Picture 15)
Picture 15. Writing words (lyrics)
After the introduction of required notes, words (lyrics) and symbols in the score, we can listen to the written piece by way of the Playback Controls window, shown in the top of the screen and it resembles a common player menu, including options like: Play, Stop, Rewind, Fast Forward, Pause, Record.
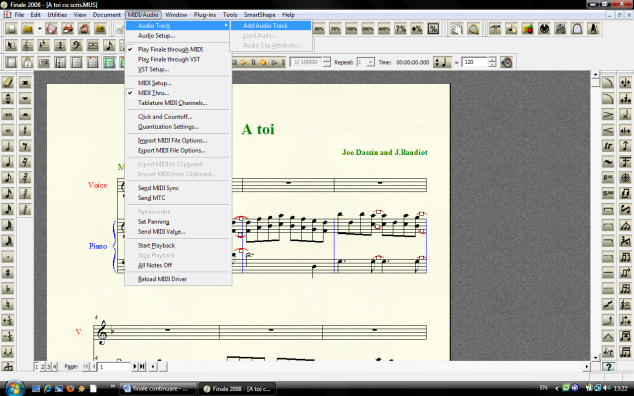
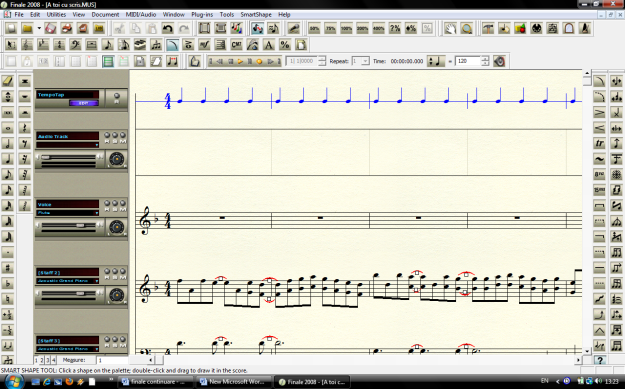
By selecting from the menu MIDI/Audio →Audio Track→ Add Audio Track on computer screen we shall enable the listening virtual tool to listen to a music piece by parts. Thus, in this music the vocal part is performed by flute, and to listen to flute’s part on the virtual tool we shall use mouse to enable the Solo button (after the inclusion of Playback Controls). Similarly, we can listen to the piano part separately. The entire score can be listened to by accessing the Record button. (Picture 16 and Picture 17)
Picture 16. Access Virtual Listening Tool Picture 17. Listen Parts or a Score
T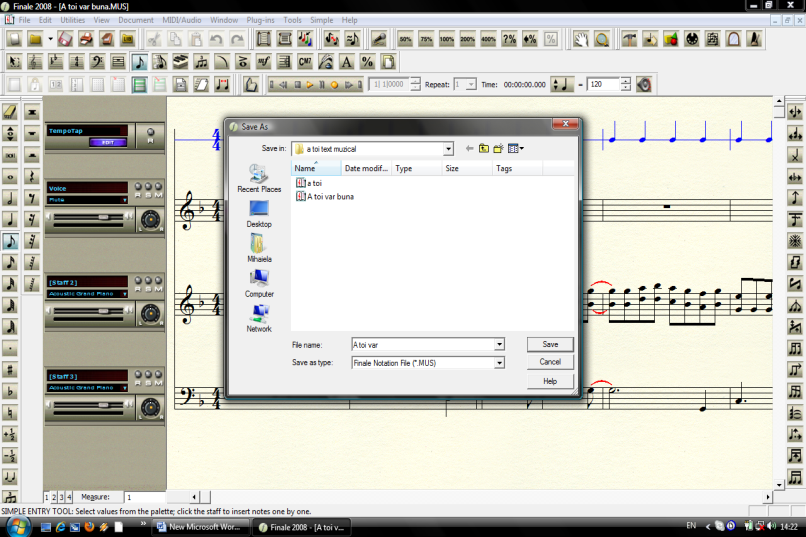 he
work at the final stage in this software assumes the saving and
printing of the written score. In the toolbar we find the respective
options Save
and Print
graphically
rendered as symbols in Word.
During the working procedure, during the writing or the editing of a
score, it is necessary to simply save the information, which is
possible to do by accessing the Save
option.
The final version of a score, as well as a document in MC
Word,
should be saved as file
in a
folder. Accordingly, we enable File
→ Save As...
and we save the score in the.MUS
format in order to print it on a sheet of paper. In case of saving
the score in the .mid
format, we save the information as an audio-file, but when we save it
in the .ftm
format,
then it is saved as an image. (Picture
18)
Picture 18. Save Score
Depending on the complexity of a composed piece during the working process with the music notation software and the sound editing in Finale, different situation may occur, such as: adding dynamic nuances, adding times, changing clef, measure or key during one and the same music piece. These problems, too, can be solved by means of technical possibilities of this music notation software.
As a result, Finale is complex music notation software and a valuable working tool for a modern musician. This fact is confirmed also by a specialist in the field, and namely D. Monahov, who drew a conclusion after the presentation of Finale software: “Such a tool can be useful not only for a composer, but also for an orchestrator (harmonist) and a conductor - for any musician who is used to express or to perceive the music message by way of traditional notation”. [3].
Bibliography:
- Белунцов В. Новейший самоучитель работы на компьютере для музыканта. – Москва: « ТехБук », 2003. – 560 с.: ил.
- Володин А. А. Электронные музыкальные инструменты. – М.: «Энергия», 1970. –144 с.: ил.
- Монахов Д. Нотные редакторы // Музыкальное оборудование, 1999. http://www.muzoborudovanie.ru/equip/studio/softother/notators/notators.php
- Петелин Ю.В., Петелин Р.Ю. Музыкальный компьютер. Секреты мастерства. – СПб.: «БХВ – Санкт – Петербург», Издательская группа “Арлит”, 2001. – 608 с.: ил.
- Степанова Ирина, Кальян Виктор. Зачем музыке компьютер? // Советская Музыка №2, 1989.
