Cubase SX is called a professional virtual studio for work with sound. This is due to its capacities and possibilities this software offers a modern musician. Specialists in the field of music software programs P. Iu. Petelin and Iu. V. Petelin present Cubase SX as „a professional music editor” stating that „Modern music editors are universal. They allow to work with music and sound at all levels of creation of a piece of music: with a good computer, a sound blaster, MIDI key and a microphone at hand, one will be able to save fragments of a melody; to harmonize and conduct the whole piece; to select the most appropriate sounds; to record the vocal and the scores of traditional musical instruments; to process the created tracks with various effects; to unite the composed piece […], to make the mastering and to prepare an album for recording on different support materials”. [2]
When using Cubase SX one works with several windows, each having the function meeting a certain requirement of the process of creation. The basic window, where one records the scores of musical instruments and the vocal is called Cubase SX Project. Editing windows, called MIDI editors provided in this program have an important role for they are able to help solve problems that may appear during the process of creation of a new piece. In this respect it is worth mentioning the Score Editor dealing with the editing and the printing of scores, List Editor designed to edit the MIDI signal, Key Editor meant to edit fragments represented as „fingerprints” of keys, and Drum Editor dealing with the editing of scores for percussion instruments. With regard to editors provided in Cubase SX program and their usage in the process of creation of a new piece, specialists in the field V. Trusova and E. Medvediev point out that „With editors’ help a musician can penetrate the insides of objects of Cubase SX program and see their contents in different visualizations. Computer representation of music information is absolutely different from the one we are used to. This is why Cubase SX provides four windows, i.t. four MIDI editors, for different levels of computer editing of music information” [1, 235].
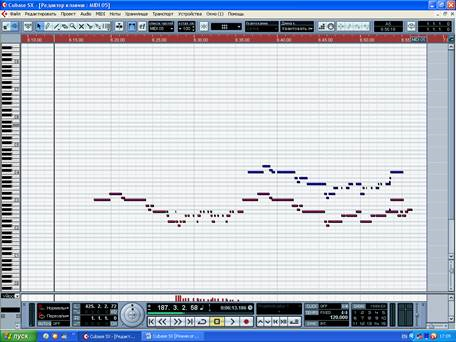
Key Editor is activated by mouse double clicking on a track. The work window of this editor shows that the performed music notes are rendered graphically by rectangular lines. Every lines stands for a music note: the duration of this note is shown by the line length, and its pitch – by the position it takes compared to the piano key displayed on the left in the Key Editor window. In the bottom of the same window one can see the Velocity parameter (the speed of pressing keys) displayed as a vertical line, or in other words one can visualize the consecution of pressing a MIDI key and the dynamics of performance (playing) (pic. 1 KEY EDITOR).

Pic. 1 KEY EDITOR
This is a window where one can change the pitch, duration and place of a music note in a piece, and namely in the top side of the window called Note Display (where notes are displayed as horizontal lines), and in the bottom side of this window called Controller Display (vertical lines – Velocity parameter) one can change the dynamics of the whole piece.
There is a toolbar in the top of the Key Editor window. By clicking on Show Info button (letter i) on the screen one will receive information about a delimited note. The latter will be shown on the top side of the window and it will include the following parameters: Start – the beginning of a note, End – the end of a note, Length – the duration of a note, Pitch – the pitch of a note, Velocity – the speed of pressing a key, Channel – the MIDI channel used to transmit the note to the program, Off Velocity – the speed of un-pressing a key. These parameters can be changed by mouse clicking on a needed inscription or by up ↑ (arrow going up) and down ↓ (arrow going down) keys or by means of the computer keyboard.
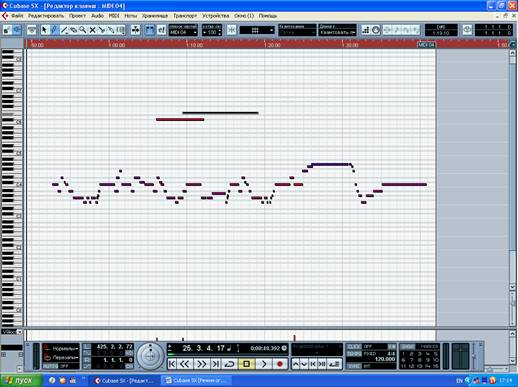
The simplest editing of music notes is to delimit a needed note by mouse and to use the tools from the Toolbar. One can access these tools from the toolbar in the top side of Key Editor window or by a right click on the mouse. Using Object selection in the toolbar one can change the position of a music note within a piece by moving it to the right or to the left, as well as the pitch of a note by moving it up or down. The Erase tool serves to erase a music note, while the tool Box is meant for listening to the notes. The Draw tool is designed to create new notes and to edit the ones previously written. To create a new note it is enough to „draw” it in a needed place, yet in order to change the duration of a note one should do the following: in order to increase the duration one uses the pencil to lengthen the „fingerprint” of a key, but to decrease it one should fix the pencil on the line which graphically represent the note and move it to the right. By using the brush tool, Paint, one can add a minimal duration. Also, the duration of a note can be made using the tool Split – it can be decreased by cutting a fragment from the “fingerprint” of a key and by pasting a new fragment on the horizontal line symbolizing the music note with the help of Glue tool (Pic. 2 A piece edited in NOTE DISPLAY).

Pic. 2 A piece edited in NOTE DISPLAY
E. Medvediev and V. Trusova, authors of the article Cubase SX for musicians, explain that “When we talk about the proceedings of melody development there are no secrets, this resembles a choice of colors. The most important is to know when and how we apply them. The same refers also to the modification of sound volume (dynamics) and timbre”. [1, 310]
In the bottom of the Key Editor window there is an editing sector named Controller Display, where one can do the editing by means of controllers of dynamics and timbre, and in this respect the abovementioned authors note that “Editing by means of controllers of dynamics and timbre is a significant part of modern music created with computer assistance. Without these components, a piece of music would be bound to have a monotonous sound, which destroys any music”. [1, 310]
The same article explains the difference between two editing sectors, Note Display and Controller Display, briefly and quite clearly for a musician with relevant academic background, and namely that “Musical sounds have four basic characteristics: the pitch and the duration of a music note, and volume and timbre of sound. The first two – the pitch and the duration of a note – are displayed as fingerprints of keys in the upper side of the editor, i.e. in Note Display. The other two – the volume and timbre of sound – can be edited in the bottom side of the editing window, i.e. in Controller Display”. [1, 310]
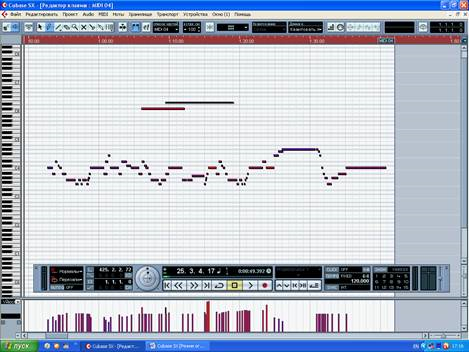
In Controller Display there is an automatic indication of the Velocity parameter. This can be changed using Draw (pencil) tool to either extend the line or decrease the vertical line. As well, in the toolbar there are lines of different forms which can help change the parameters indicated in this sector. Thus, one of the possibilities to edit the parameters of controllers is to modify them by means of tools from the toolbar of the Key Editor window, which is called graphic editing. Cubase SX provides two more options of editing a piece of music in the Controller Display sector: by making a real-time recording of virtual instruments provided by the program and by re-recording of the wanted part with the help of computer-connected MIDI key (external MIDI instrument). It is necessary to mention that by controllers the producer indicated MIDI messages called Non- Note Events, which include among others also the Velocity controller. By modifying its parameters one will manage to change the volume and timbre of sound. As mentioned above, Velocity controller is displayed graphically as vertical lines placed to the right side of each note (at the beginning). To the left side of the Controller Display sector there are two small windows: the lower one displays a tool for graphical editing (for instance, Draw tool), while the upper one includes a controller to help one change (modify) a piece of music (for instance, Velocity controller), and also by accessing it one can open a list of controllers on the screen with 6 Non-Note Events automatically displayed in the list, where one can choose another controller to edit the work. By means of the Setup option selected from the menu one can open on the computer screen the Controllers Menu Setup window with two lists of controllers. The In menu list includes controllers from the menu of the graphical editing section, while the Hidden list displays all other controllers. To add another controller from one list into another one can use arrows in the lower side of the Controllers Menu Setup window and confirm the operation by clicking on the OK button. Most of the times it is much easier to edit several controllers simultaneously. To have this option one can create a new work file in the Controller Display sector by double clicking and selecting the option Create New Controller Lane. In the sector of controllers graphical editing there will appear a new line, on the left side one will select a tool to be used for editing and instead of Velocity controller, which is displayed automatically as mentioned, one will select a new controller, for instance main volume which will be helpful in changing the volume of sound and the dynamics of a piece (Pic. 3 Create New Controller Lane / adding Main Volume ).

Pic. 3 Create New Controller Lane / adding Main Volume
The dynamics and the timbre are the other two means of expressivity, which importance is beyond doubt in the work on any composition creation. The emergence of new tools contributed to increased series of the timbre, while current music software programs made an input in the “possibility to create timbres independently, which is a significant upsurge in the field of music”. [1, 329]
Despite impressive possibilities to create new timbres with computer help, when creating them one should keep in mind the music concept and should not make abuse of the technological “offers”, which is also an advice given by the authors of the abovementioned article: “When working with music material one should always have the sense of proportion or moderation which is one of the most important principles of art. The plenty of expressivity means of the music language should not be limited only to timbral change, no mater how appealing it may be. We should take into account that saving (economizing) the expressivity means allows to present the timbre – in the right and necessary moment - as impressive and novel”. [1, 329]
Bibliography:
1. Медведев Е.В., Трусова В.А. Cubase SX для музыкантов. – СПб.; БХВ – Петербург; 2003. – 640 с.; ил.
2. Петелин Ю.В., Петелин Р.Ю. Cubase SX 3: где прячется музыка.// http://www.petelin.ru/pcmagic/cubase3/cubase3.htm

